A timeline from start to completion...
Early days: living in the bungalow and creating a car port
In practice the bungalow appeared to be in reasonable condition, so having sold our existing house we decided to move into it.
With the suitable building plot secured, and a year having passed we returned to Zanzibar to complete the design of the house in readiness to submit a planning application.
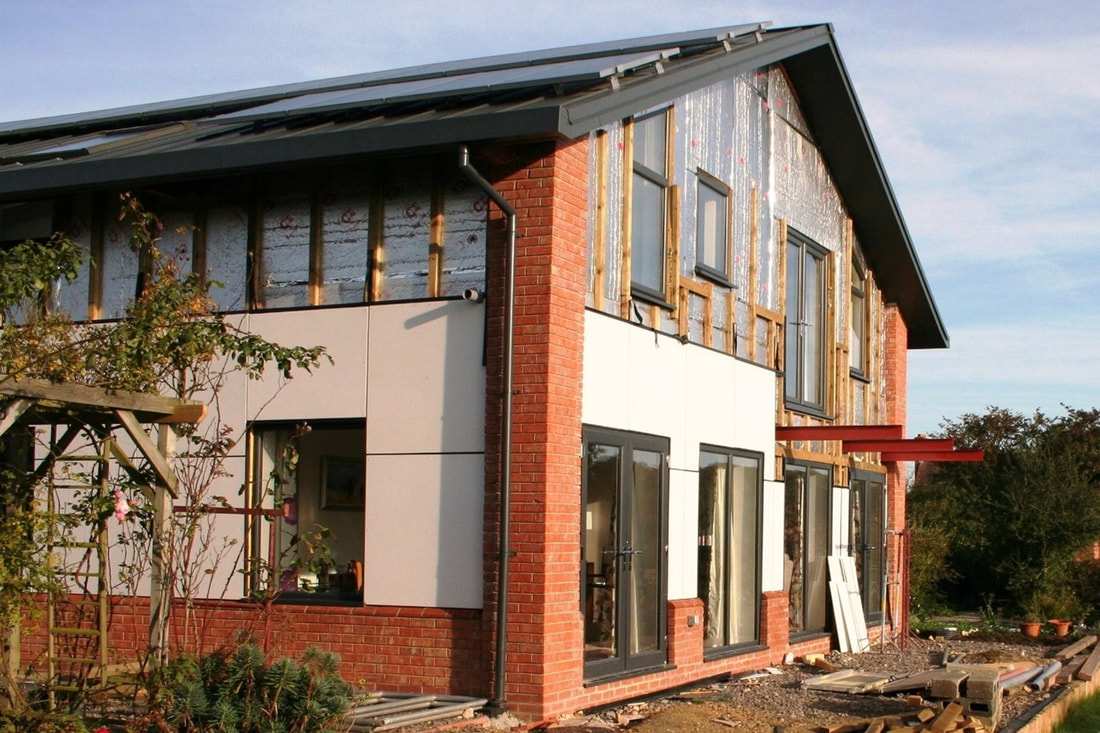
From the outset, the house was to be architecturally bold, and as energy efficient as our £250k budget would allow. The roof was to be no higher than the bungalow it would replace, the open plan interior had to be light and airy, and a construction method allow for rapid construction so as to minimise the length of time we would need to rent alternative accommodation.
My background in bridge construction soon dictated the construction method, combining reinforced and pre-stressed concrete, a steel portal frame, SIP’s roof panels, just sufficient exposed brickwork to form an architectural feature and rain-shield cladding to ensure minimal rain water absorption on the exposed site.
With our requirements committed to paper, we engaged a local architect to take over the designs, prepare and submit the planning application.
In the meantime, whilst living in the bungalow we commissioned a specialist timber company to construct a timber framed 2-bay car port in the rear garden under the bungalow’s permitted development rights. To keep the overall height less than 3.0m, and provide a contemporary look to a traditional structure, we opted for an asymmetrical profile to the roof, clad with cedar shingles.
In practice the bungalow appeared to be in reasonable condition, so having sold our existing house we decided to move into it.
With the suitable building plot secured, and a year having passed we returned to Zanzibar to complete the design of the house in readiness to submit a planning application.
From the outset, the house was to be architecturally bold, and as energy efficient as our £250k budget would allow. The roof was to be no higher than the bungalow it would replace, the open plan interior had to be light and airy, and a construction method allow for rapid construction so as to minimise the length of time we would need to rent alternative accommodation.
My background in bridge construction soon dictated the construction method, combining reinforced and pre-stressed concrete, a steel portal frame, SIP’s roof panels, just sufficient exposed brickwork to form an architectural feature and rain-shield cladding to ensure minimal rain water absorption on the exposed site.
With our requirements committed to paper, we engaged a local architect to take over the designs, prepare and submit the planning application.
In the meantime, whilst living in the bungalow we commissioned a specialist timber company to construct a timber framed 2-bay car port in the rear garden under the bungalow’s permitted development rights. To keep the overall height less than 3.0m, and provide a contemporary look to a traditional structure, we opted for an asymmetrical profile to the roof, clad with cedar shingles.
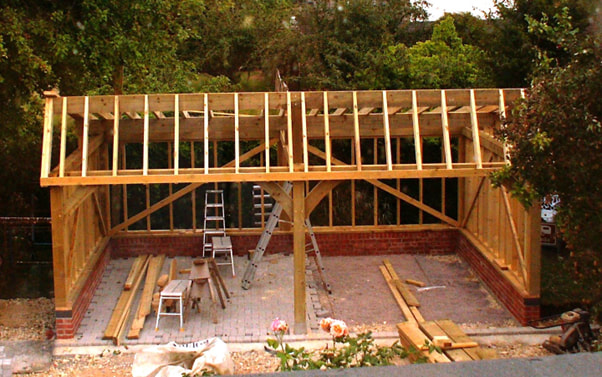
The timber framed car port under construction
We were so pleased with the car port, that we immediately commissioned a matching workshop building, again as permitted development, so that whilst the car port could provide storage during the new build, the workshop could be used as a joinery shop.
The planning process - a bumpy beginning
Pre-consultation meetings with the Planning Department before buying the bungalow, had suggested that the proposed new house would be acceptable.
However, the planning officers became increasingly obstructive as the date to determine the application approached, and called for various design changes to be made and revised drawings submitted, which incurred additional professional fees.
Then having complied with all their requests for detail changes the Senior Planning Officer decided to recommend refusal of application.
After lobbying the local councillors, the plans were “called in” and the project approved unanimously by the elected councillors on the planning committee after they had visited the site. Some even commented on how skilfully the traditional timber framed car-port and workshop had been blended into the surroundings and how well they would contrast with the ultra-modern elevations of the new house.
After moving from the bungalow into rented accommodation, the building work finally started on the 4th January 2012 - some two years after we decided to “downsize”.
January 2012: WORK BEGINS!
Week 1 –2 Strip and demolish the bungalow and clear the site. Excavate and form the hard-standings that would ultimately become part of the drive and forecourt, but would also be needed for the cranes lifting the various components into place.
Week 1 –2 Strip and demolish the bungalow and clear the site. Excavate and form the hard-standings that would ultimately become part of the drive and forecourt, but would also be needed for the cranes lifting the various components into place.

Suddenly…. the negative equity stage…
Week 3 Install the foul and storm drainage, and new external water supply pipes
Weeks 4 & 5 Excavate for, and cast the reinforced concrete foundations with holding down bolts for the steel-frame. Block-work below DPC, over-site stone base and sub-floor insulation.
Weeks 4 & 5 Excavate for, and cast the reinforced concrete foundations with holding down bolts for the steel-frame. Block-work below DPC, over-site stone base and sub-floor insulation.
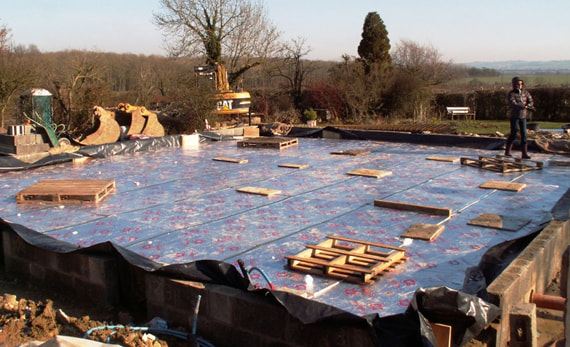
Weeks 5 & 6 Cast the double reinforced concrete raft above the insulation and build the internal load bearing walls off it.
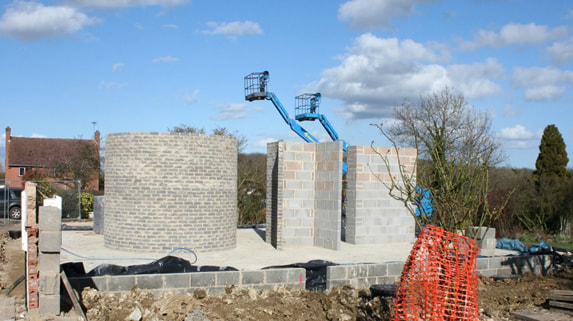
Week 7 Erect the steel portal frame.
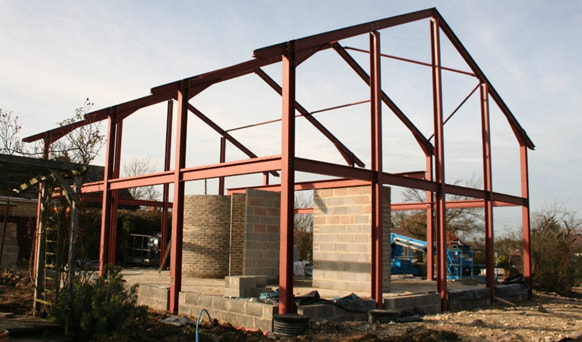
Week 8 Complete the block-work below DPC around the columns.
Week 9 Install the pre-stressed concrete beam and block first floor.
Week 9 Install the pre-stressed concrete beam and block first floor.
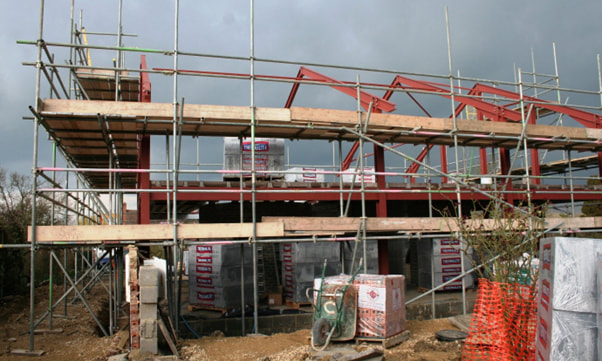
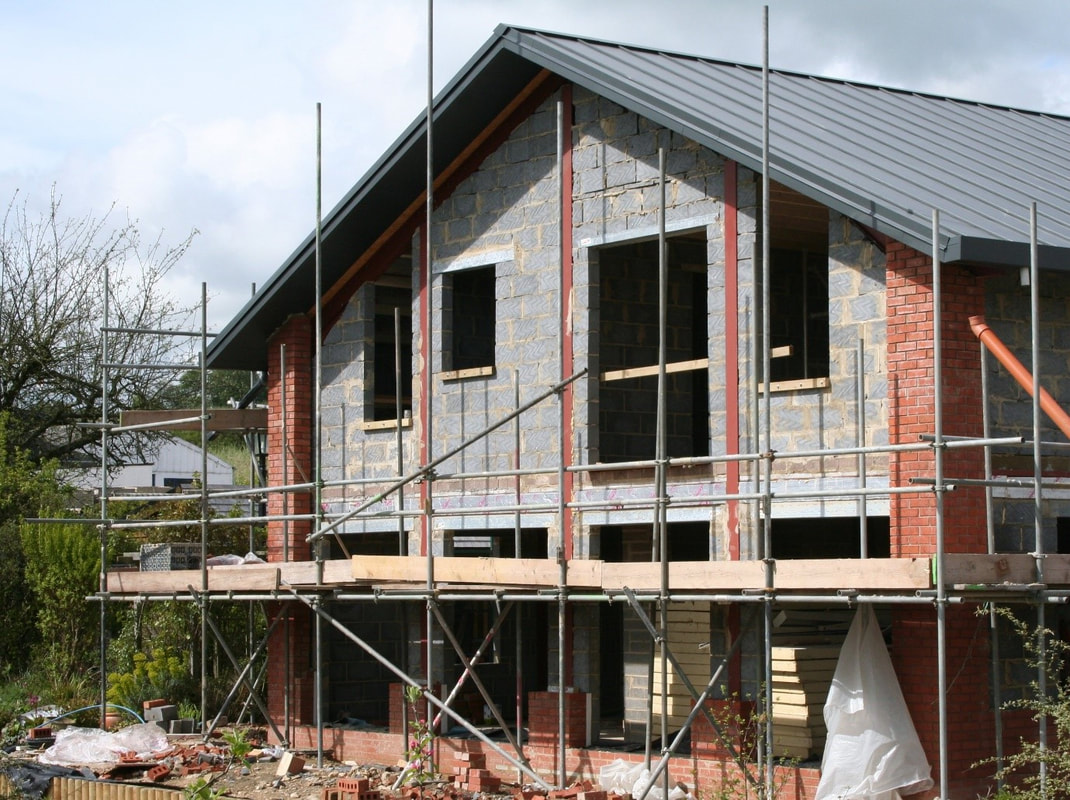
Week 10 Complete the beam and block first floor. Erect the free-standing scaffolding around the “house” to allow safe access for all the remaining trades – some of which would be working concurrently.
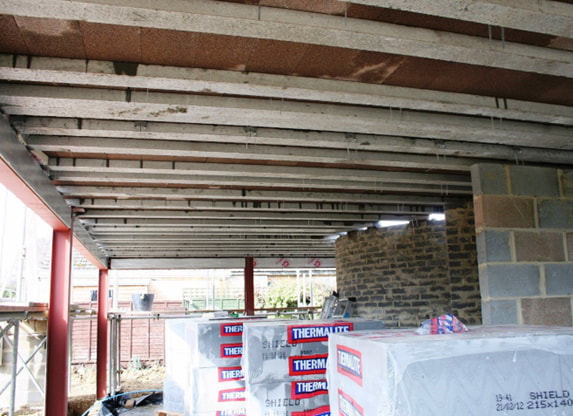
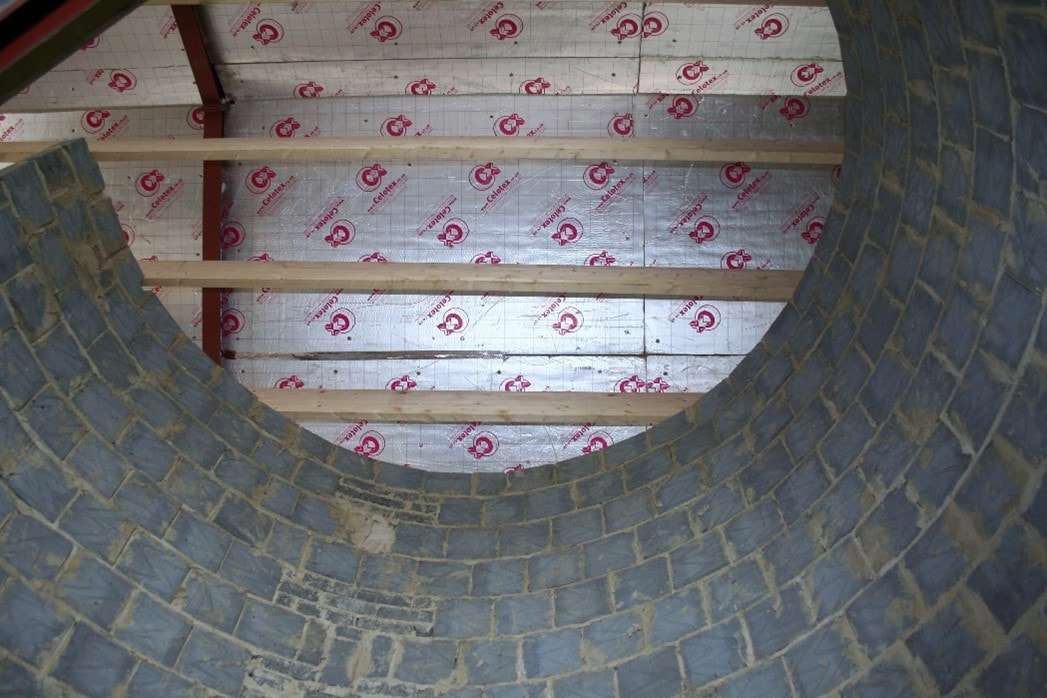
Week 11 Install the Structural Insulated Panels (SIPs) and rebated “engineered” timber purlins bolted directly to the steel portal rafters.
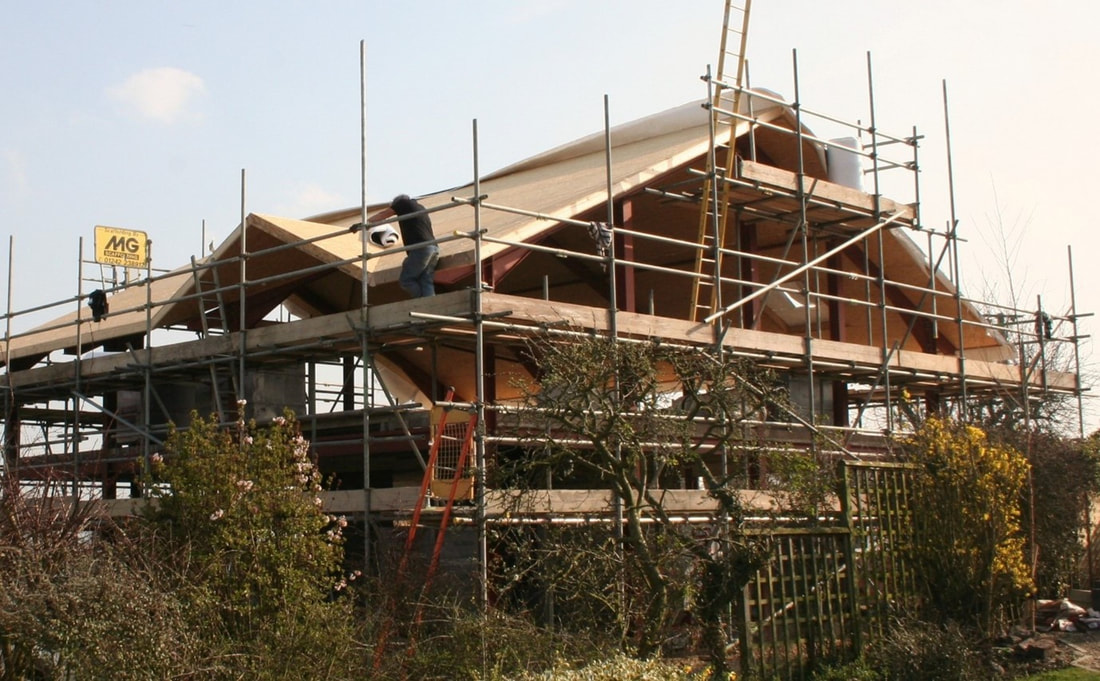
Weeks 12 -17 Install the standing seam steel roof over the SIPs, complete with its integral gutters, fascia, soffits and downpipes. Whilst internally one team bonds further insulation to underside of SIPs, bricklayers construct the internal and external walls, working on two floors simultaneously.
Week 18 Install the “engineered” timber ceiling joists to first floor. Plasterboard to first floor ceilings and timber framing in bathrooms to conceal pipework. 1st fix for electrics and plumbing.
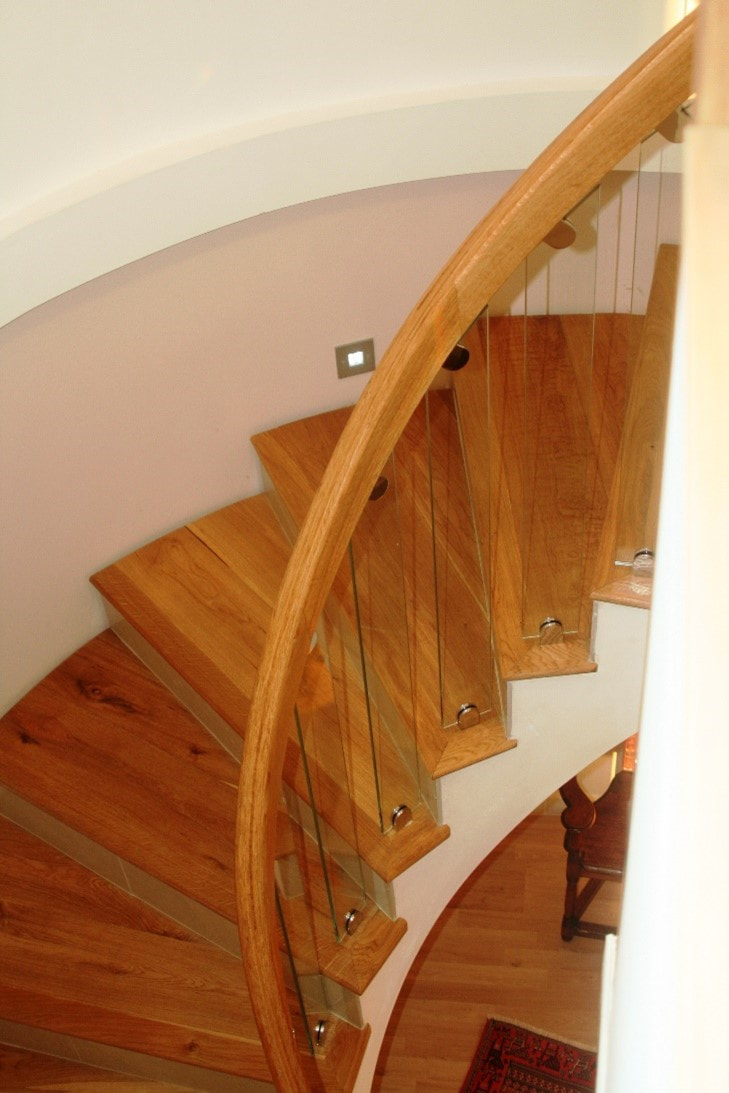
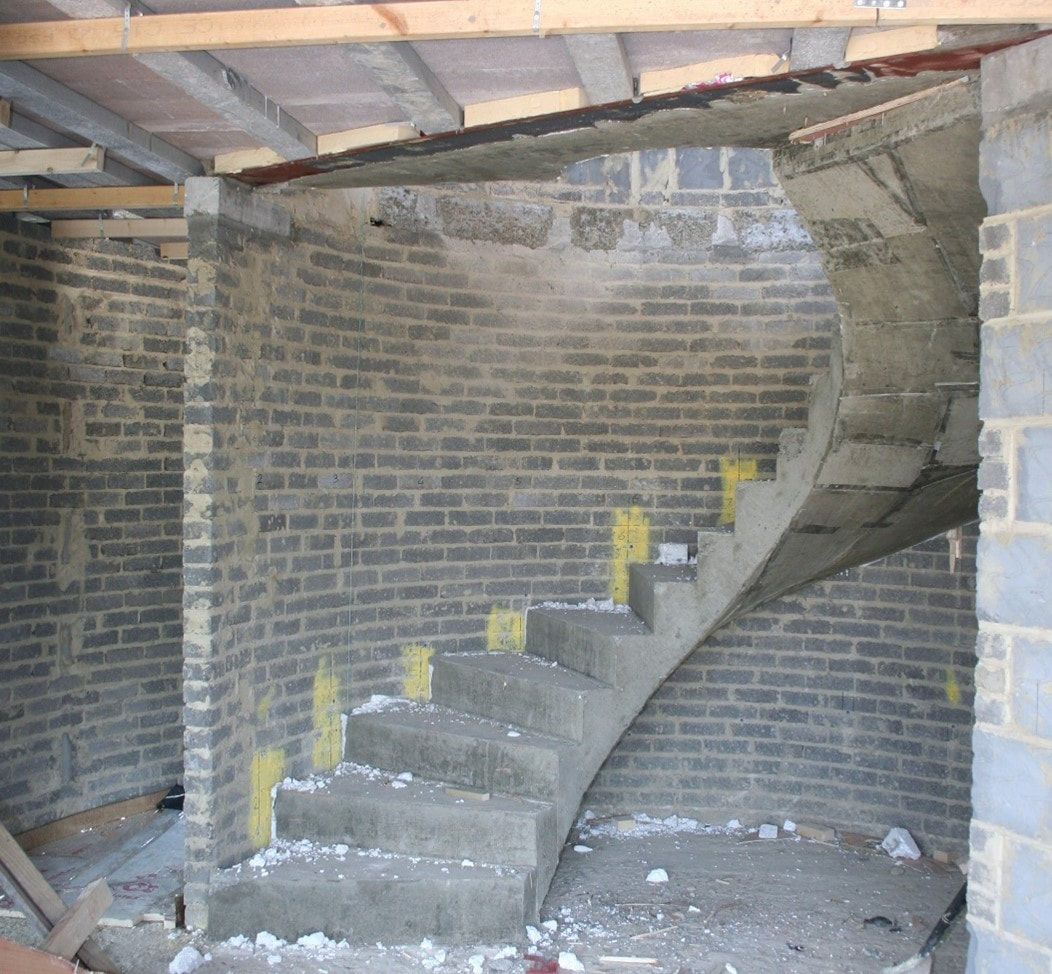
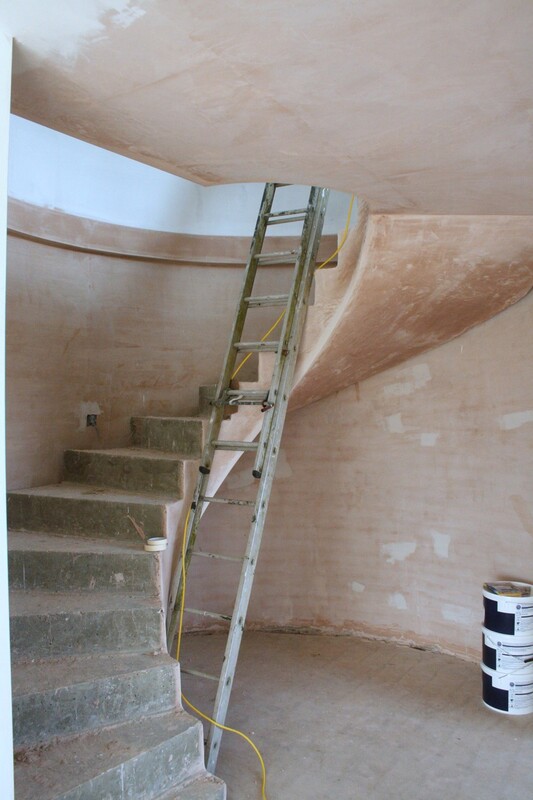
Week 19 Cast the reinforced concrete “flying” helical staircase and part of the first-floor landing.
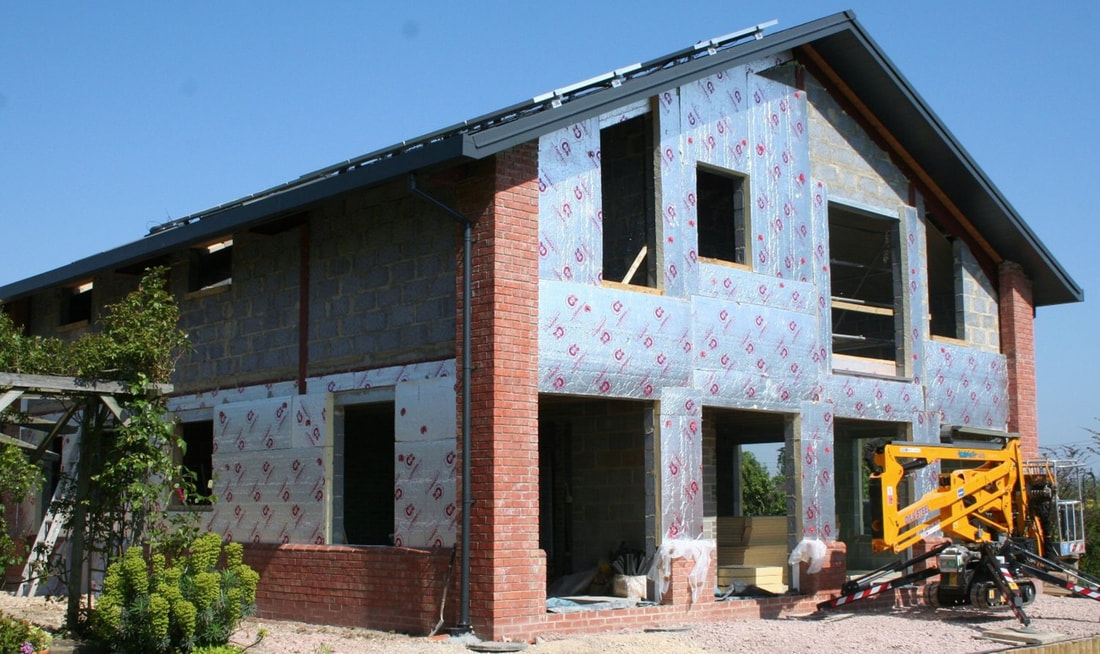
Week 20 PV solar panels installed. Fix insulation to outface of external walls.
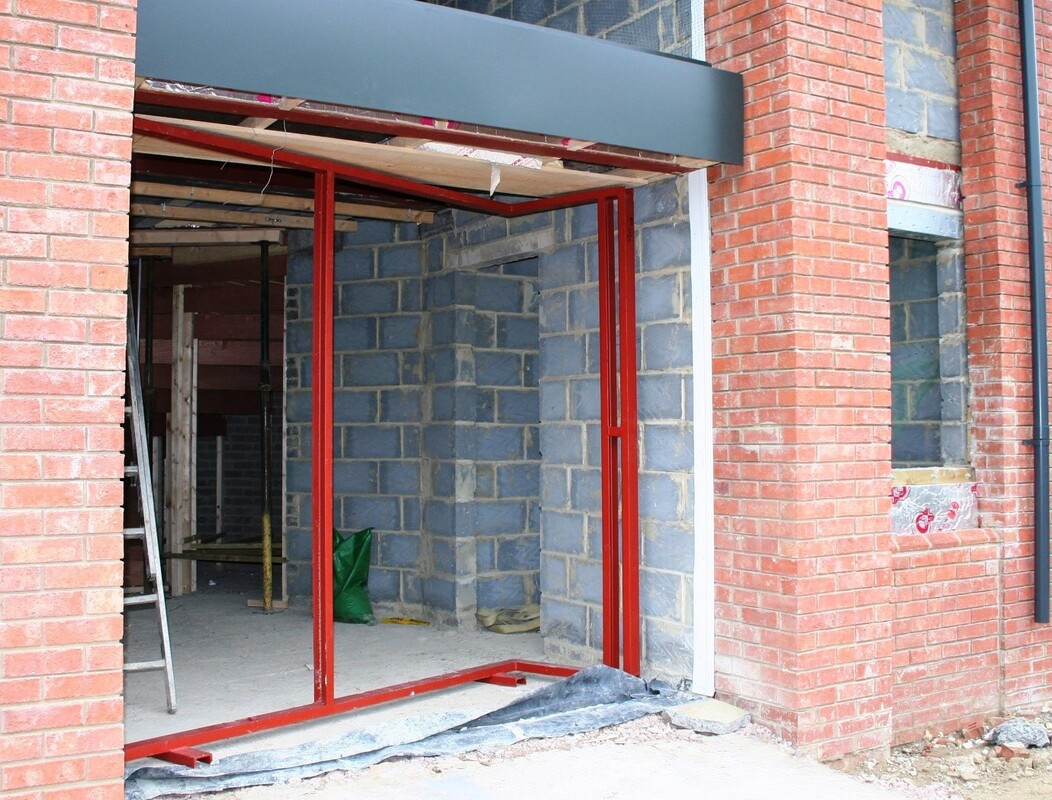
Week 21 Install windows and the welded steel frame for the massive front door.
Week 22-24 Lay the under-floor heating pipes and manifolds - external insulation completed.

… over 1000m of pipe work installed…
Week 25 Place the pumped self-levelling floor screed and leave to cure. Joinery work to “L” shaped front door and side screen continues.
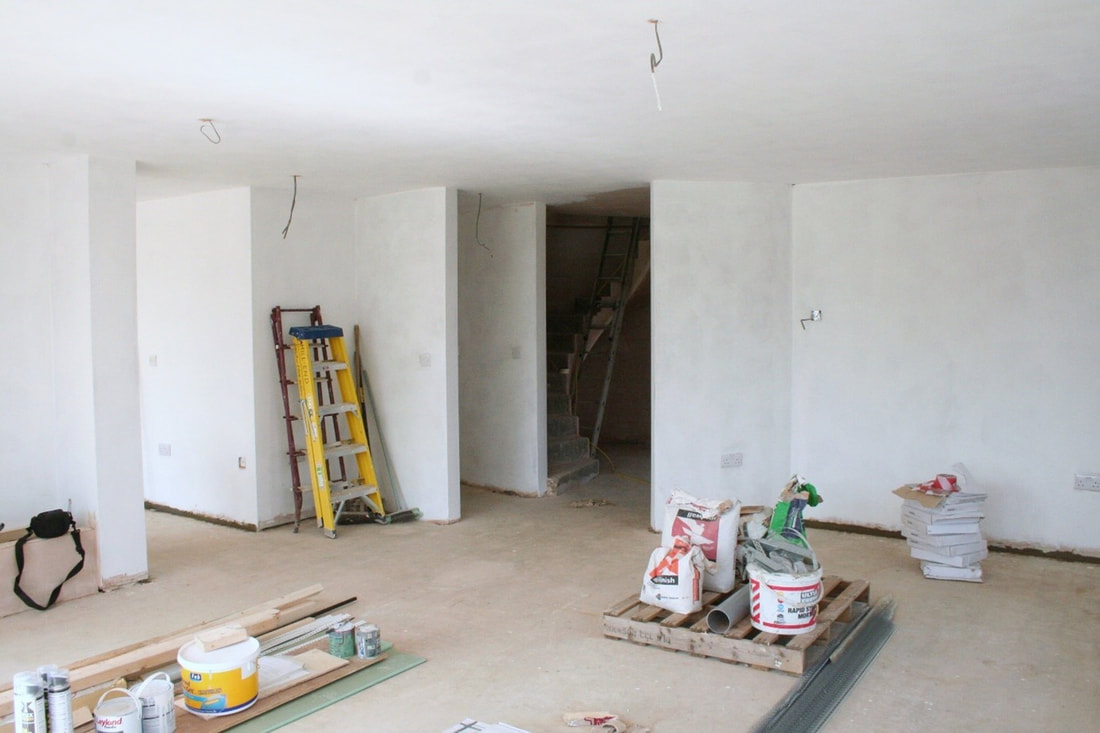
Week 26 -30 Work progressing on two floors simultaneously, with plastering to internal walls and ceilings – decoration – kitchen installation.
Week 26 -30 Work progressing on two floors simultaneously, with plastering to internal walls and ceilings – decoration – kitchen installation.
Week 30-35 Up to eleven tradesmen working on site to install the air source heat pump – complete the plumbing and electrical installations - hang internal doors.

The air source heat pump installed
Week 35 The house is sufficiently complete to allow us to move in* to reduce the risk of theft from it, whilst the final fit out continues.
Major house builders typically allow 30 - 32 weeks to complete a new house to a standard design on a “green field” housing estate. 35 weeks for a one-off to a unique design with many ECO features, including demolishing of the original bungalow, is exceptional.
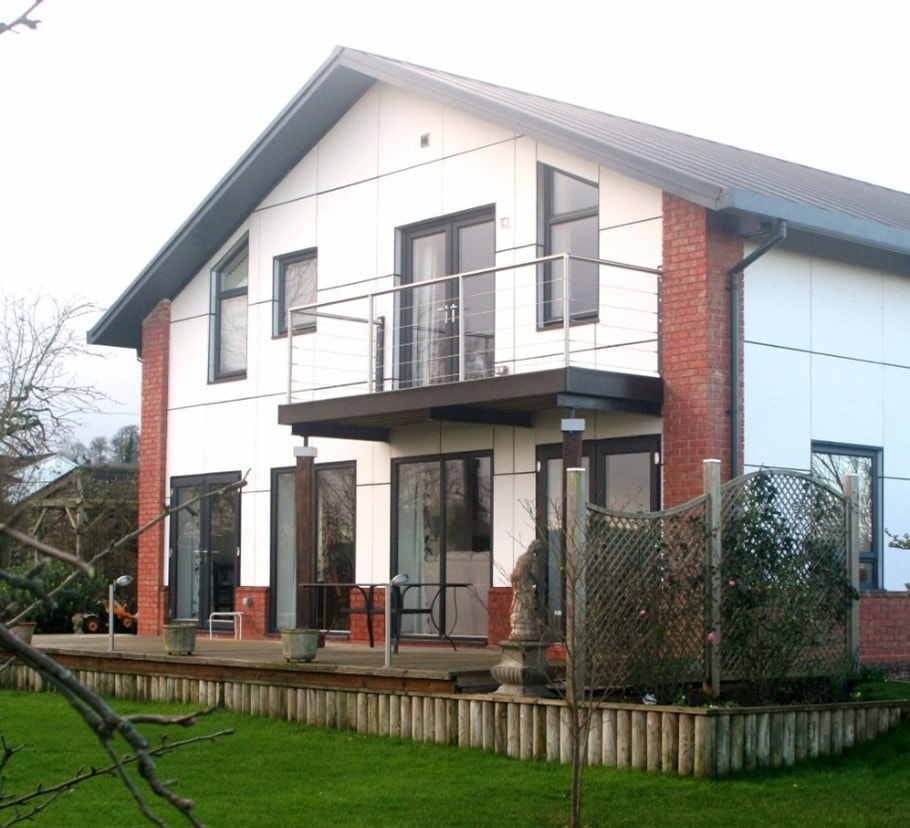
Week 35 + Having moved into the house the number of tradespersons is reduced and the pace slows down. Complete the external rain-shield panelling, balcony and external works.
THE FINAL INTERNAL FIT-OUT TOOK SOMEWHAT LONGER TO COMPLETE! The balustrade for the helical stairs was formed by bending and laminating 13 No. strips of 3mm air dried oak in-situ around a helical former. Ultimately the hand rail was supported by purpose- made toughened glass ballisters, set off each oak tread.